This page covers everything related to managing your sections and roster in Hello World. Select a topic below to jump to the steps you need.
On this page:
How to Create a Section
How to Enroll Students
How to Edit Courses in a Section
How to Archive a Section
Roster Changes
Note for Clever customers: Your sections sync automatically through Clever. Please contact support for rostering assistance rather than creating manual sections. Clever section changes update every 24 hours — if your sections aren't updated after 24 hours, contact your Clever administrator.
How to Add a Section
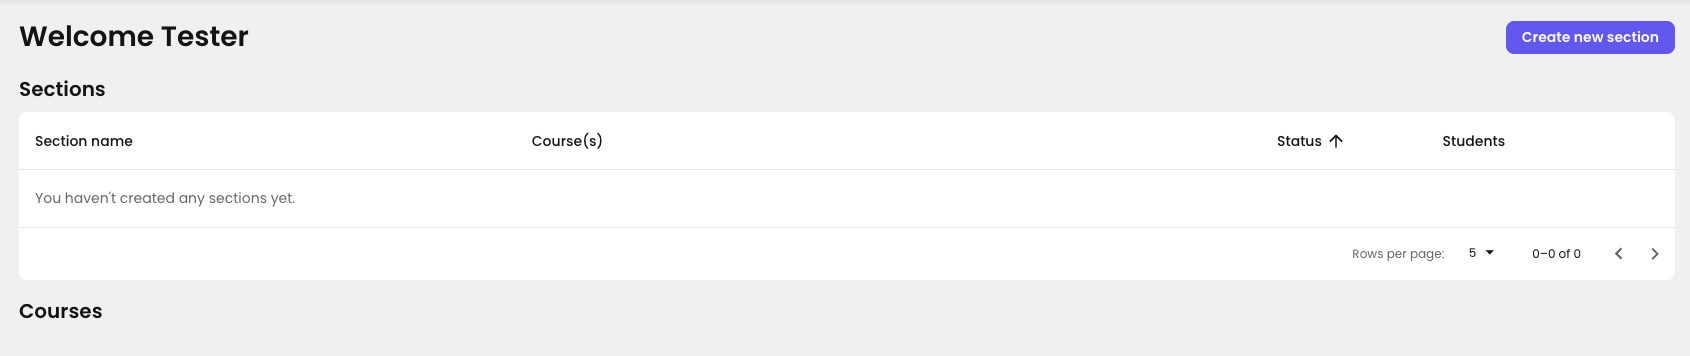
1. From your teacher dashboard, click Create New Section
The Create New Section button can be found in the upper right.
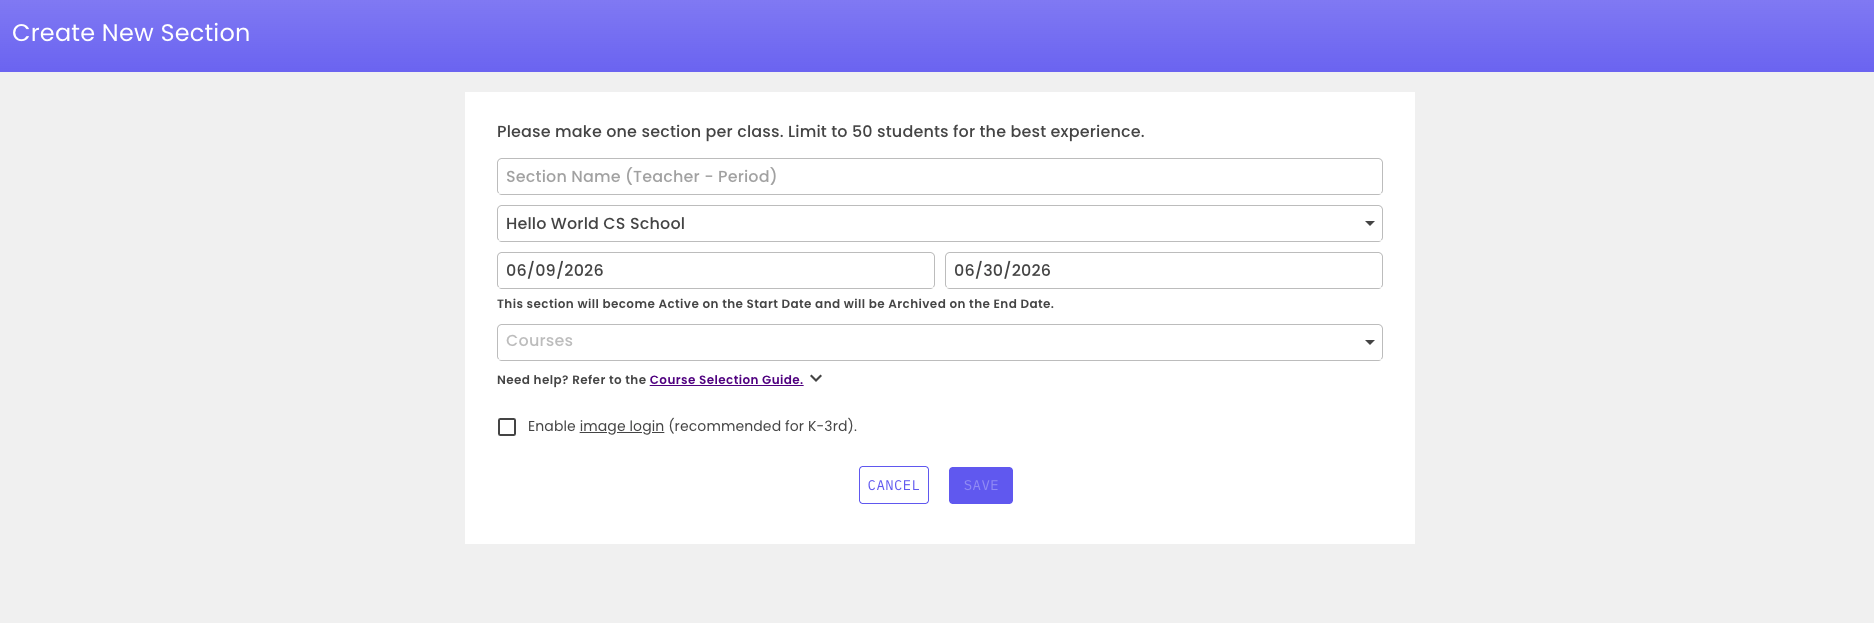
2. Complete the following required fields:
Section Name - We recommend using the teacher's last name and their class period. For example, "Allen Period 4" would be the name of the Section.
School
Start date - This should be the start of the school term. Sections become Active on the Start Date
End date - This should be the end of the school term. Sections Archived on the End Date.
Course - Select one or more course. If you need help selecting a course, open the Course Selection Guide (located under the Course field)
3. Click Save and continue to the Roster & Login page to enroll your students.
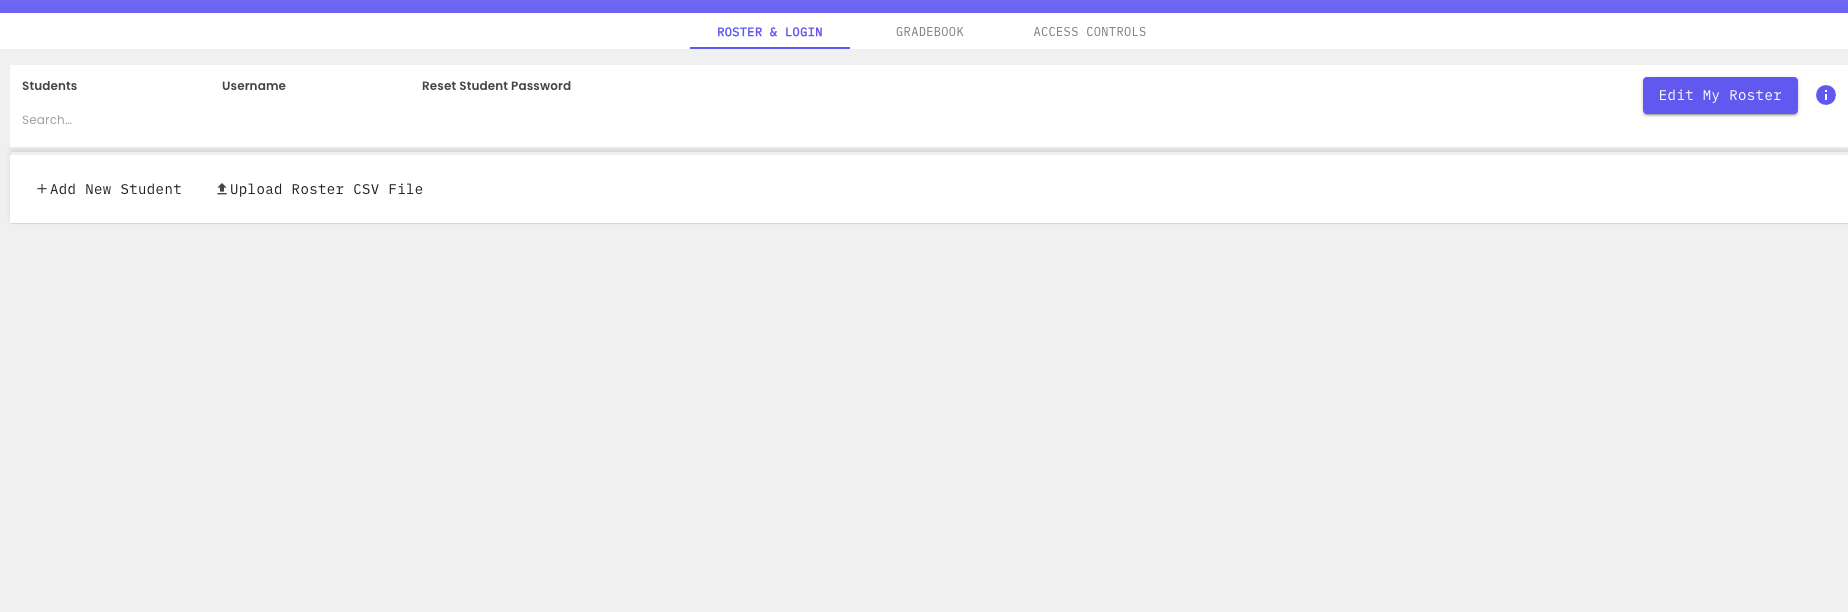
Click Get Started to begin enrolling students
If you choose to skip this step, you can always return to your dashboard, where you will find that Section under Sections.
How to Enroll Students
Are you a free user? Visit this page for free account enrollment instructions.
From your teacher dashboard, navigate to your section
Click the Roster & Login tab
To add students individually, click Add New Student and enter each student's first and last name
To add students in bulk, click Upload Roster CSV File and follow the on-screen instructions:
Download the Hello World Roster Template, fill it out in Google Sheets, Excel, or Numbers, and save it as a CSV
Upload the saved file
Scroll to the bottom and click Save — your roster CSV with student usernames and passwords will automatically download. Save this file for future reference.
Add a Co-Teacher: Email success@helloworldcs.org to request a co-teacher be added to your section.
Student Login Options:
Username and password — Share the downloaded CSV with students so they can log in with their credentials
Login cards — Recommended for elementary students. Contact success@helloworldcs.org to activate this feature. Once enabled, click Print Login Cards in the top right of your teacher dashboard, cut them out, and distribute to students
From your teacher dashboard, locate the section you want to edit
Click the pencil icon on the section
In the Section Editor, click the course dropdown
Check boxes to add courses or uncheck boxes to remove them
Click Save
Clever Users: Email support@helloworldcs.org with the section name(s) and the course(s) you want added or removed. The support team will make these changes for you.
How to Archive a Section
From your teacher dashboard, navigate to Sections
Find the section you want to atrchive
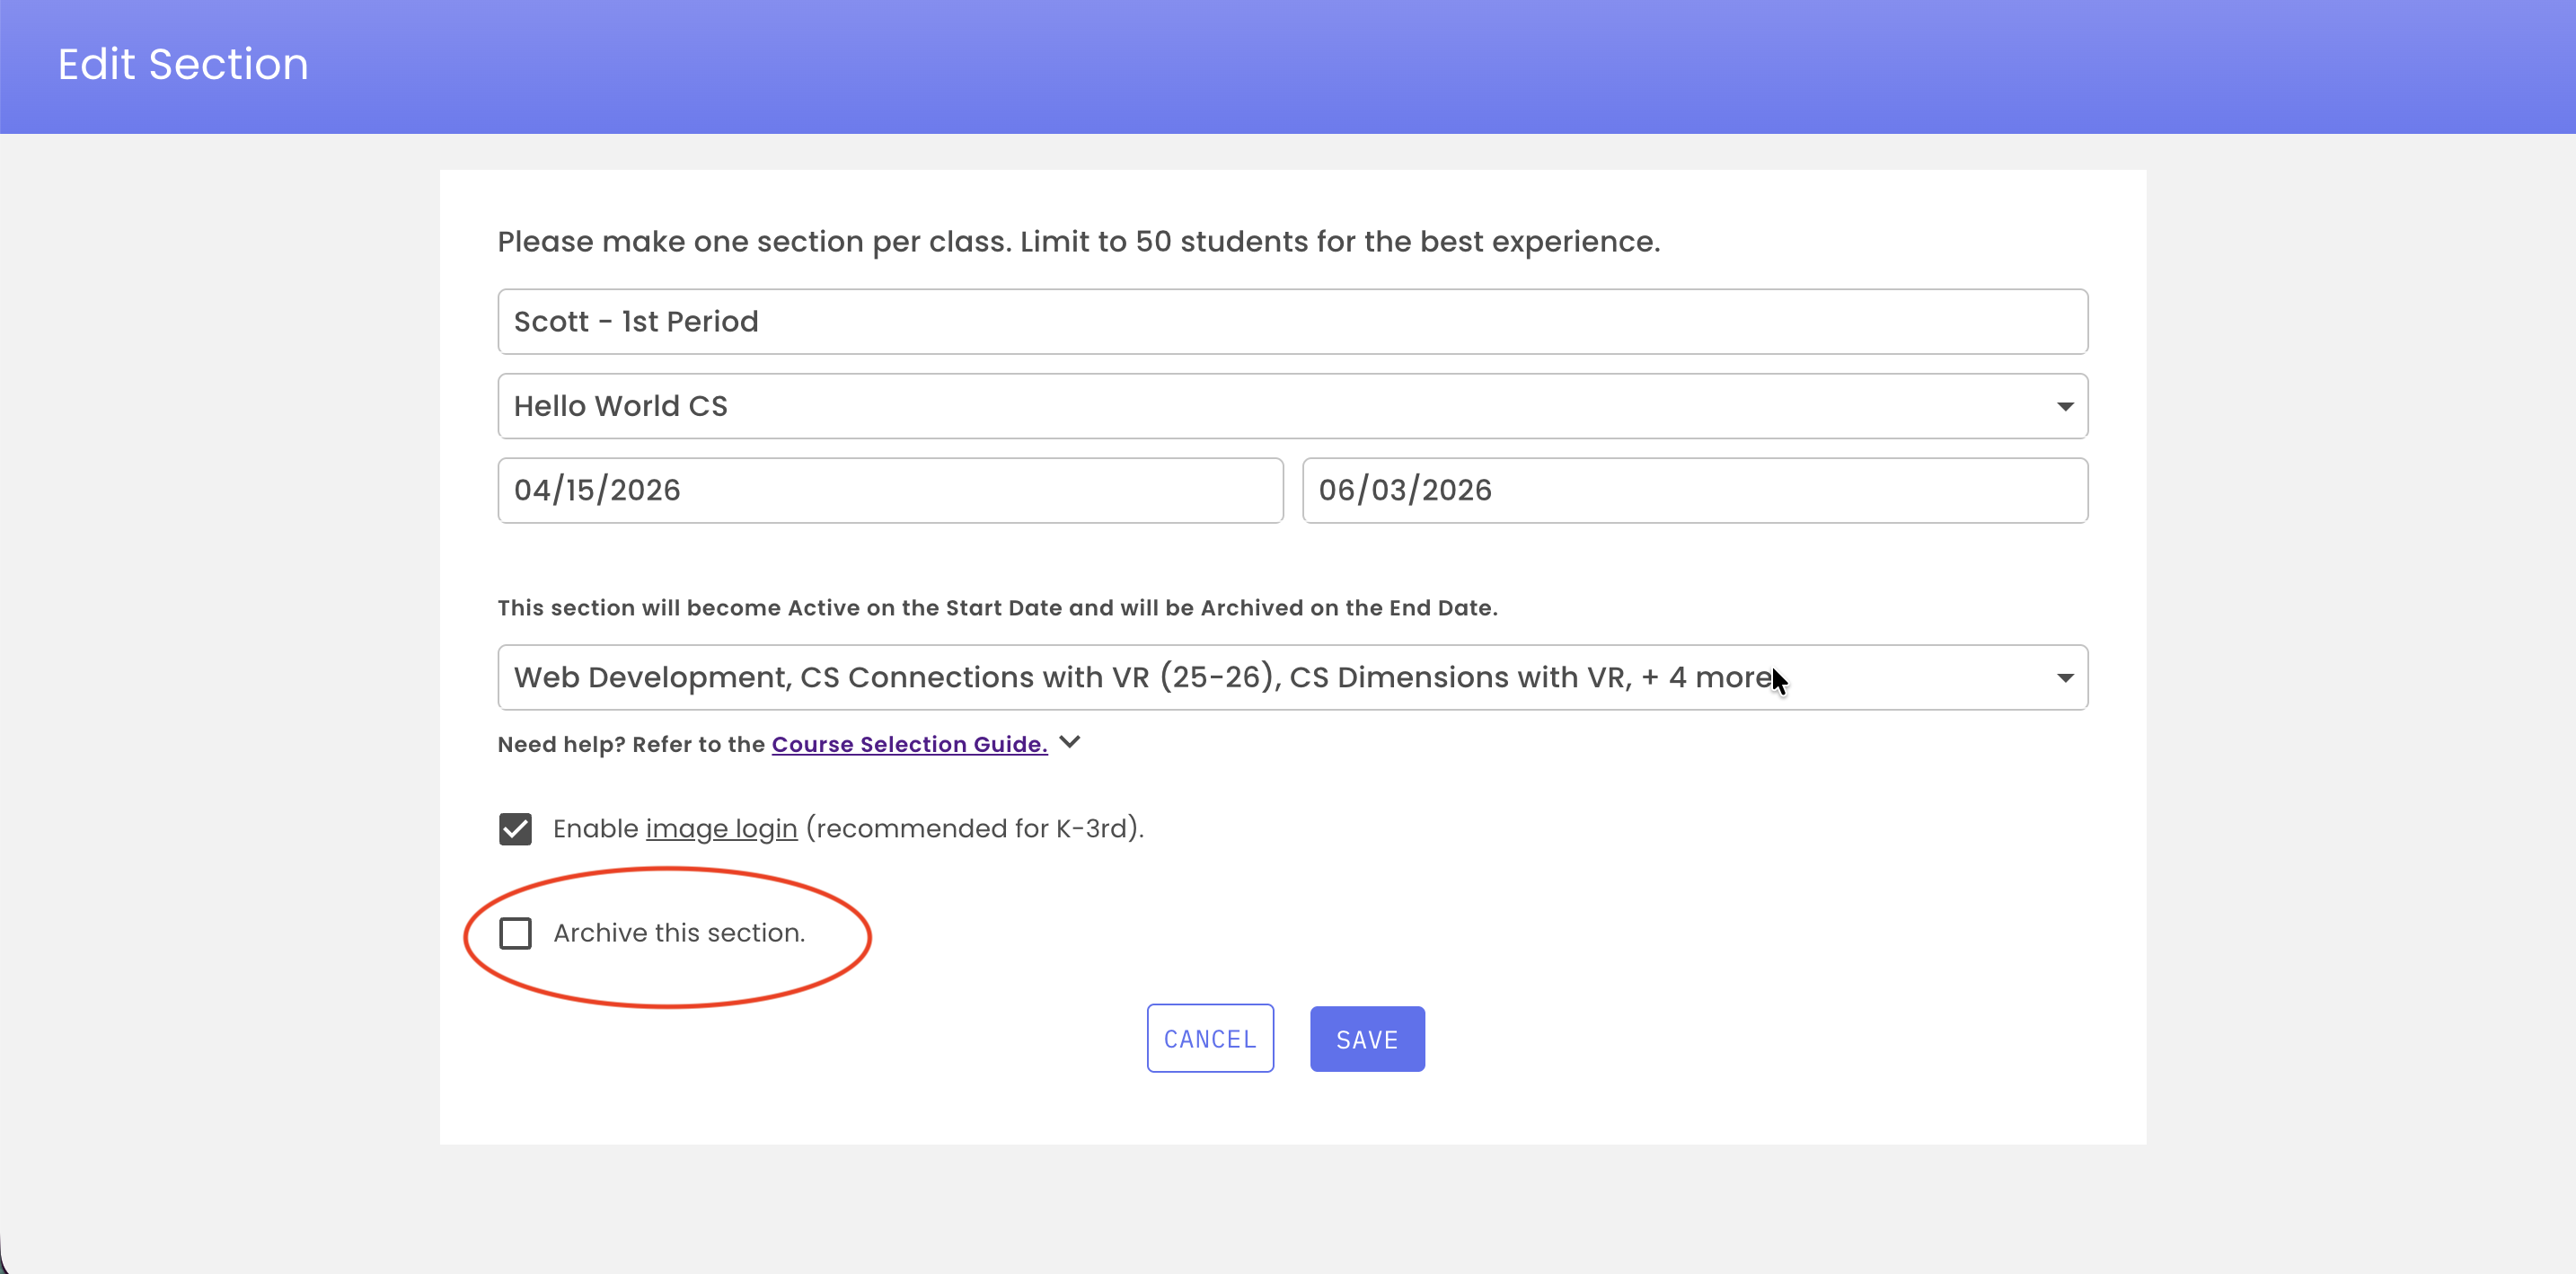
Click the pencil (edit) icon on the section
Check "Archive this section"
The section will be labeled Archived on your dashboard
Clever Users: Contact your Clever admin to remove the section from your Clever sync or update the sharing settings. This change will sync automatically overnight.
Roster Changes
Manual Users: Follow the steps in the Enroll Students section above to add, update, or remove students from your roster.
Clever Users: Roster changes sync automatically every 24 hours. If your sections haven't updated after 24 hours, contact your Clever administrator.